The Starlink Mini has become a vital tool for travelers, remote workers, and homeowners who require fast, reliable satellite internet in areas where traditional providers fail to deliver. However, the effectiveness of Starlink Mini often depends on how it is installed and secured. One of the most efficient methods for maximizing performance is the starlink mini flat mount. Designed for stability, durability, and convenience, this mounting solution allows you to position your Starlink Mini in a way that ensures consistent connectivity and stronger signal reception, no matter where you are.
Why Proper Installation Matters
The Relationship Between Placement and Performance
Starlink technology relies on uninterrupted communication with satellites in low Earth orbit. A poorly mounted device may shift or become obstructed, leading to weaker signals or frequent drops in service. The starlink mini flat mount minimizes these risks by keeping the device steady and properly aligned.
Low-Profile Advantage
Unlike pole or tripod mounts, the starlink mini flat mount keeps the device close to the surface, offering a sleek design that blends with rooftops, RVs, and boats. This not only enhances aesthetics but also reduces wind resistance, which can disrupt service during storms or high winds.
Preparing for Installation
Step 1: Select the Ideal Location
The first step in installing a starlink mini flat mount is finding the best location. Ensure the spot offers a wide, unobstructed view of the sky. Avoid areas with trees, tall buildings, or power lines, as these may interfere with the satellite’s line of sight.
Step 2: Gather Necessary Tools
While many starlink mini flat mount models are designed for tool-free installation, some may require basic tools such as a drill, screws, or adhesive pads. Confirm what your specific mount requires before starting.
Step 3: Inspect the Surface
Before mounting, check that the surface is flat, clean, and stable. For rooftop installations, ensure shingles or panels are secure. For RV or boat setups, confirm that the surface can support the mount without risk of detachment.
Step-by-Step Installation Guide
Securing the Flat Mount
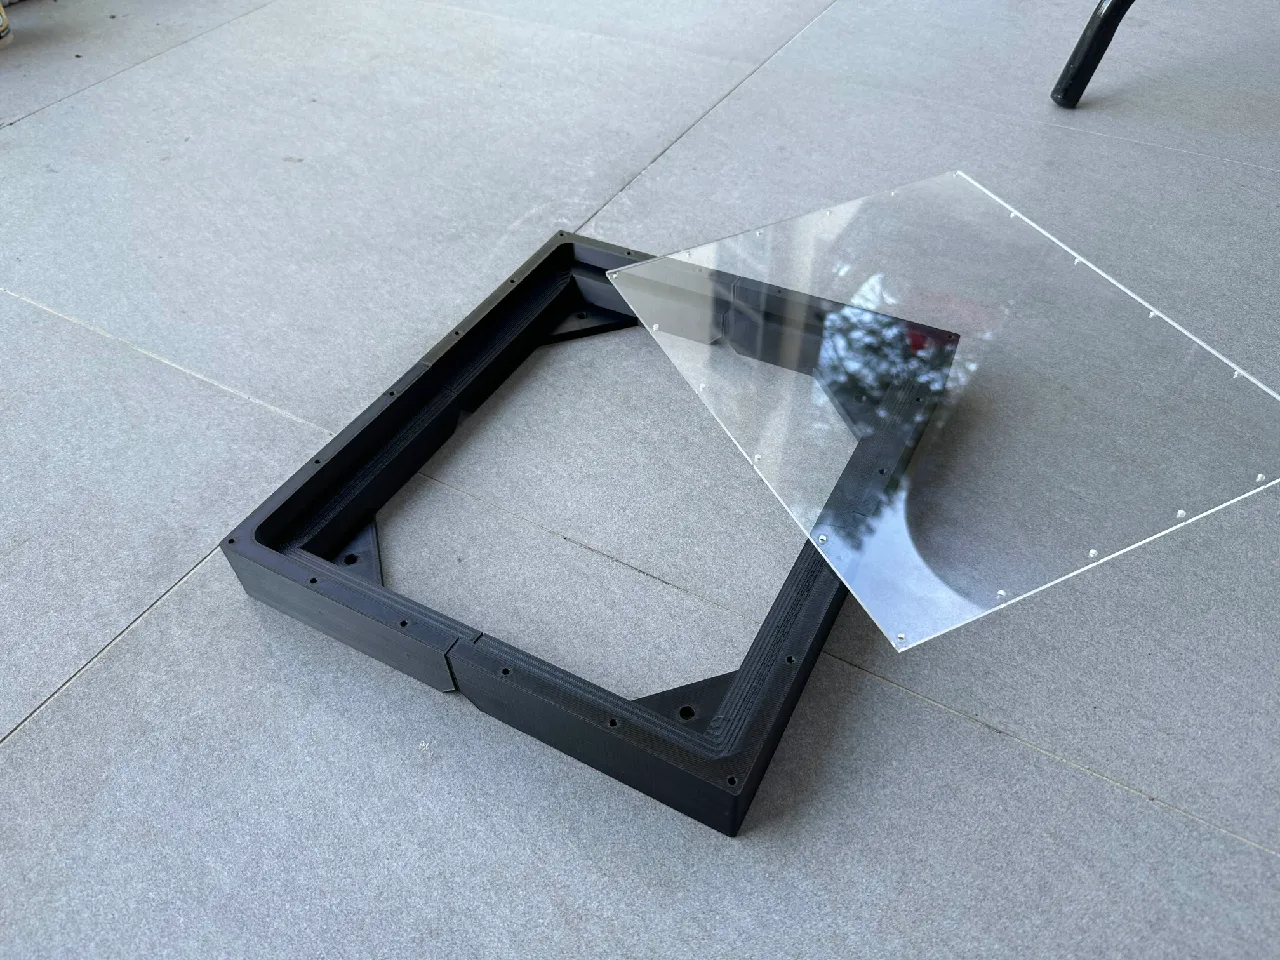
Place the starlink mini flat mount in the chosen location. Depending on the design, secure it using heavy-duty screws for permanent setups or adhesive pads for temporary installations. Ensure the mount is firmly in place to prevent shifting.
Attaching the Starlink Mini
Once the mount is secured, attach your Starlink Mini by aligning it with the mount’s locking mechanism. Most flat mounts are designed for easy, tool-free attachment. Confirm the device sits flush and does not wobble.
Connecting the System
After securing the device, connect the Starlink Mini to power and the router. Ensure cables are properly routed to prevent tangling or damage. A starlink mini flat mount keeps the device stable while protecting connections from unnecessary strain.
Testing the Signal
Open the Starlink app and test signal strength. A properly installed starlink mini flat mount should provide a stable and consistent connection. If performance seems weak, adjust the positioning slightly to optimize satellite visibility.
Tips for Optimal Performance
Monitor Obstructions
Even after installation, periodically check for new obstructions like growing trees or newly constructed buildings. The starlink mini flat mount keeps the device steady, but placement is still key to strong connectivity.
Consider Seasonal Changes
In regions with heavy snow or shifting foliage, signal quality may change throughout the year. Adjusting the angle or cleaning around the starlink mini flat mount can help maintain consistent performance.
Use in Mobile Setups
For RVs, boats, and campers, portability is essential. The starlink mini flat mount allows easy removal and reinstallation, making it ideal for users who frequently change locations.
Comparing Mounting Options
Flat Mount vs. Tripod Mount
Tripod mounts are better for temporary ground setups but less stable in windy environments. A starlink mini flat mount offers stronger security for rooftops and vehicles.
Flat Mount vs. Pole Mount
Pole mounts lift the dish higher, but they require more effort to install and are more exposed to harsh weather. A starlink mini flat mount balances stability with ease of use.
Flat Mount vs. Wall Mount
Wall mounts work only on vertical surfaces, limiting flexibility. A starlink mini flat mount can be installed on nearly any flat surface, offering greater versatility.
Maintaining Your Starlink Mini Flat Mount
Regular Cleaning
Dirt, dust, and debris can accumulate on the surface of the mount. Cleaning your starlink mini flat mount regularly ensures long-term reliability and better signal reception.
Tightening and Inspection
Over time, vibrations from wind or travel may loosen screws or adhesives. Inspect the starlink mini flat mount every few months to confirm it remains secure.
Weather Protection
Although most mounts are weather-resistant, extreme conditions can wear them down. Inspect for cracks, rust, or weakened adhesive, and replace or reinforce if needed.
Who Benefits Most from Flat Mount Installations?
Homeowners
A starlink mini flat mount provides a discreet rooftop installation that blends with the environment while maintaining excellent connectivity.
RV and Camper Owners
For travelers, portability is key. The starlink mini flat mount is lightweight and easy to install, making it ideal for on-the-go setups.
Boaters and Outdoor Enthusiasts
The starlink mini flat mount is also perfect for marine use or remote cabins, ensuring strong internet access even in challenging environments.
Final Thoughts
Installing a starlink mini flat mount is one of the most effective ways to maximize your Starlink Mini’s performance. Its low-profile design, durability, portability, and ability to enhance signal strength make it a superior choice over alternative mounting options. Whether you are a homeowner, traveler, or remote worker, the starlink mini flat mount ensures your internet remains stable, secure, and powerful in every setting.